I.Mô tả
Hướng dẫn Sử dụng kết nối Module Lcd I2C -PCF8574 với LCD16X2 trên Kit Arduino Uno
Hướng dẫn Sử dụng kết nối Module Lcd I2C -PCF8574 với LCD16X2 trên KitArduino Uno
Hướng dẫn cài đặt và sử dụng Arduino IDE
Mời các bạn xem Tại đây :
Module Lcd I2C -PCF8574
– Điện áp sử dụng : 5v DC
– Giao tiếp : I2C
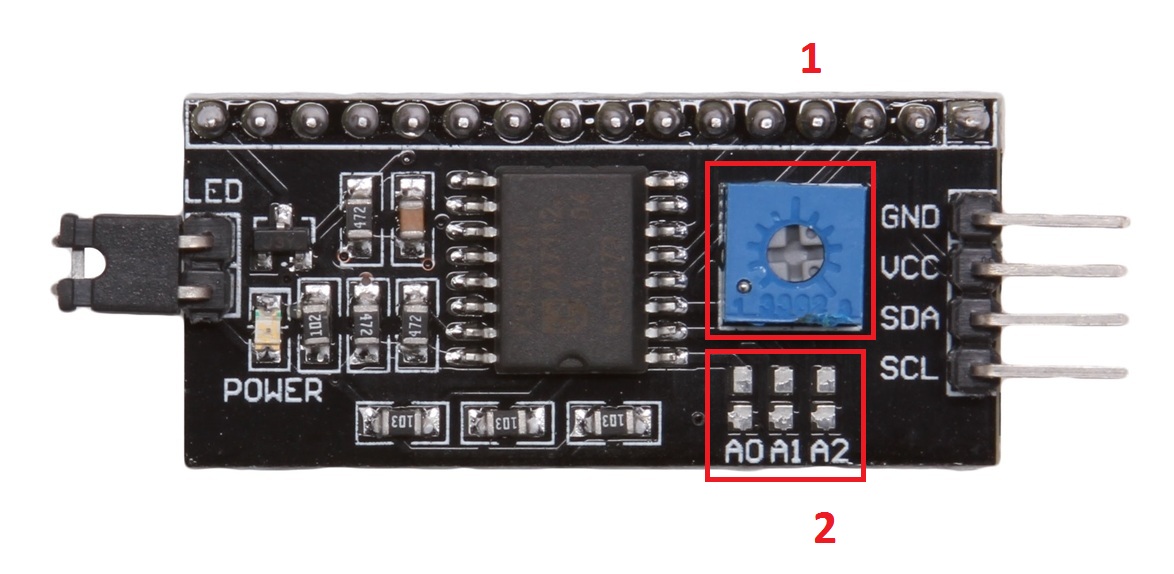
1 : Biến trở điều chỉnh độ tường phản của màn hình LCD
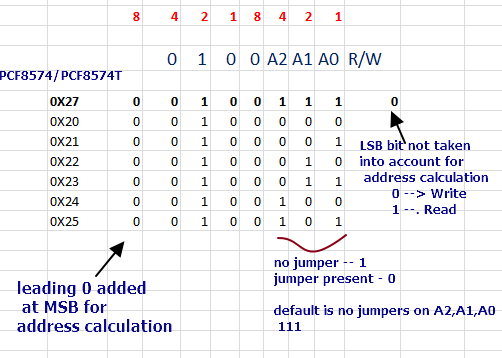
2 : Đây là khu vực thay đổi địa chỉ I2C , nếu các bạn muốn kết nối nhiều thiết bị trên 1 đường I2C địa chỉ 0x27 ,thì bạn phải thay đổi nó , Mặc định nhà sản xuất là A0,A1,A2 =1 (mức cao) như thế này Module có địa chỉ là 0X27
Các bạn tham khảo bảng sau :
Hoặc bạn có thể Nạp Code Scan địa chỉ bus của Module I2C như sau :
Các bạn nạp code sau vào và bật Serial Monitor lên và sẽ thấy địa chỉ.
// --------------------------------------
// i2c_scanner
//
// Version 1
//    This program (or code that looks like it)
//    can be found in many places.
//    For example on the Arduino.cc forum.
//    The original author is not know.
// Version 2, Juni 2012, Using Arduino 1.0.1
//     Adapted to be as simple as possible by Arduino.cc user Krodal
// Version 3, Feb 26  2013
//    V3 by louarnold
// Version 4, March 3, 2013, Using Arduino 1.0.3
//    by Arduino.cc user Krodal.
//    Changes by louarnold removed.
//    Scanning addresses changed from 0...127 to 1...119,
//    according to the i2c scanner by Nick Gammon
//    http://www.gammon.com.au/forum/?id=10896
// Version 5, March 28, 2013
//    As version 4, but address scans now to 127.
//    A sensor seems to use address 120.
// Version 6, November 27, 2015.
//    Added waiting for the Leonardo serial communication.
//
//
// This sketch tests the standard 7-bit addresses
// Devices with higher bit address might not be seen properly.
//

#include <Wire.h>


void setup()
{
  Wire.begin();

  Serial.begin(9600);
  while (!Serial);             // Leonardo: wait for serial monitor
  Serial.println("\nI2C Scanner");
}


void loop()
{
  byte error, address;
  int nDevices;

  Serial.println("Scanning...");

  nDevices = 0;
  for(address = 1; address < 127; address++ )
  {
    // The i2c_scanner uses the return value of
    // the Write.endTransmisstion to see if
    // a device did acknowledge to the address.
    Wire.beginTransmission(address);
    error = Wire.endTransmission();

    if (error == 0)
    {
      Serial.print("I2C device found at address 0x");
      if (address<16)
        Serial.print("0");
      Serial.print(address,HEX);
      Serial.println("  !");

      nDevices++;
    }
    else if (error==4)
    {
      Serial.print("Unknown error at address 0x");
      if (address<16)
        Serial.print("0");
      Serial.println(address,HEX);
    }
  }
  if (nDevices == 0)
    Serial.println("No I2C devices found\n");
  else
    Serial.println("done\n");

  delay(5000);           // wait 5 seconds for n
}
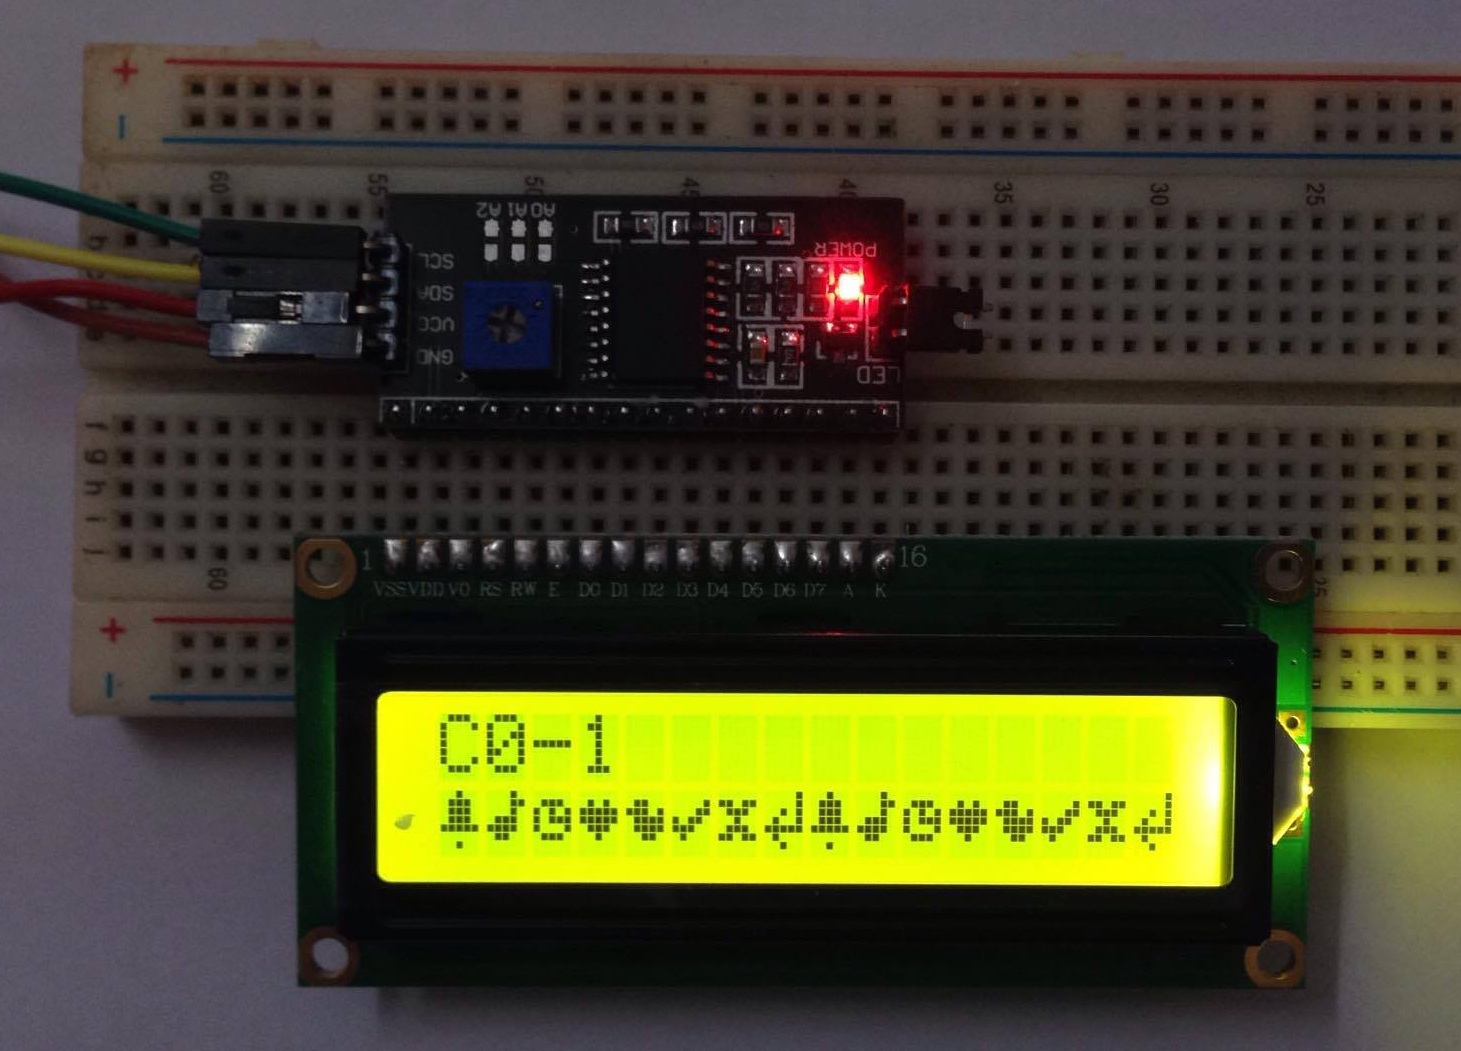
Kết quả là :
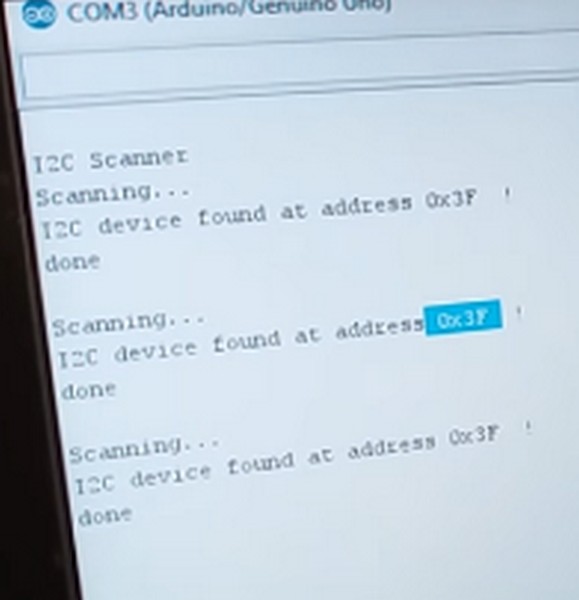
Địa chỉ này để các bạn thay thế cho đúng mã địa chỉ ở code phía dưới .
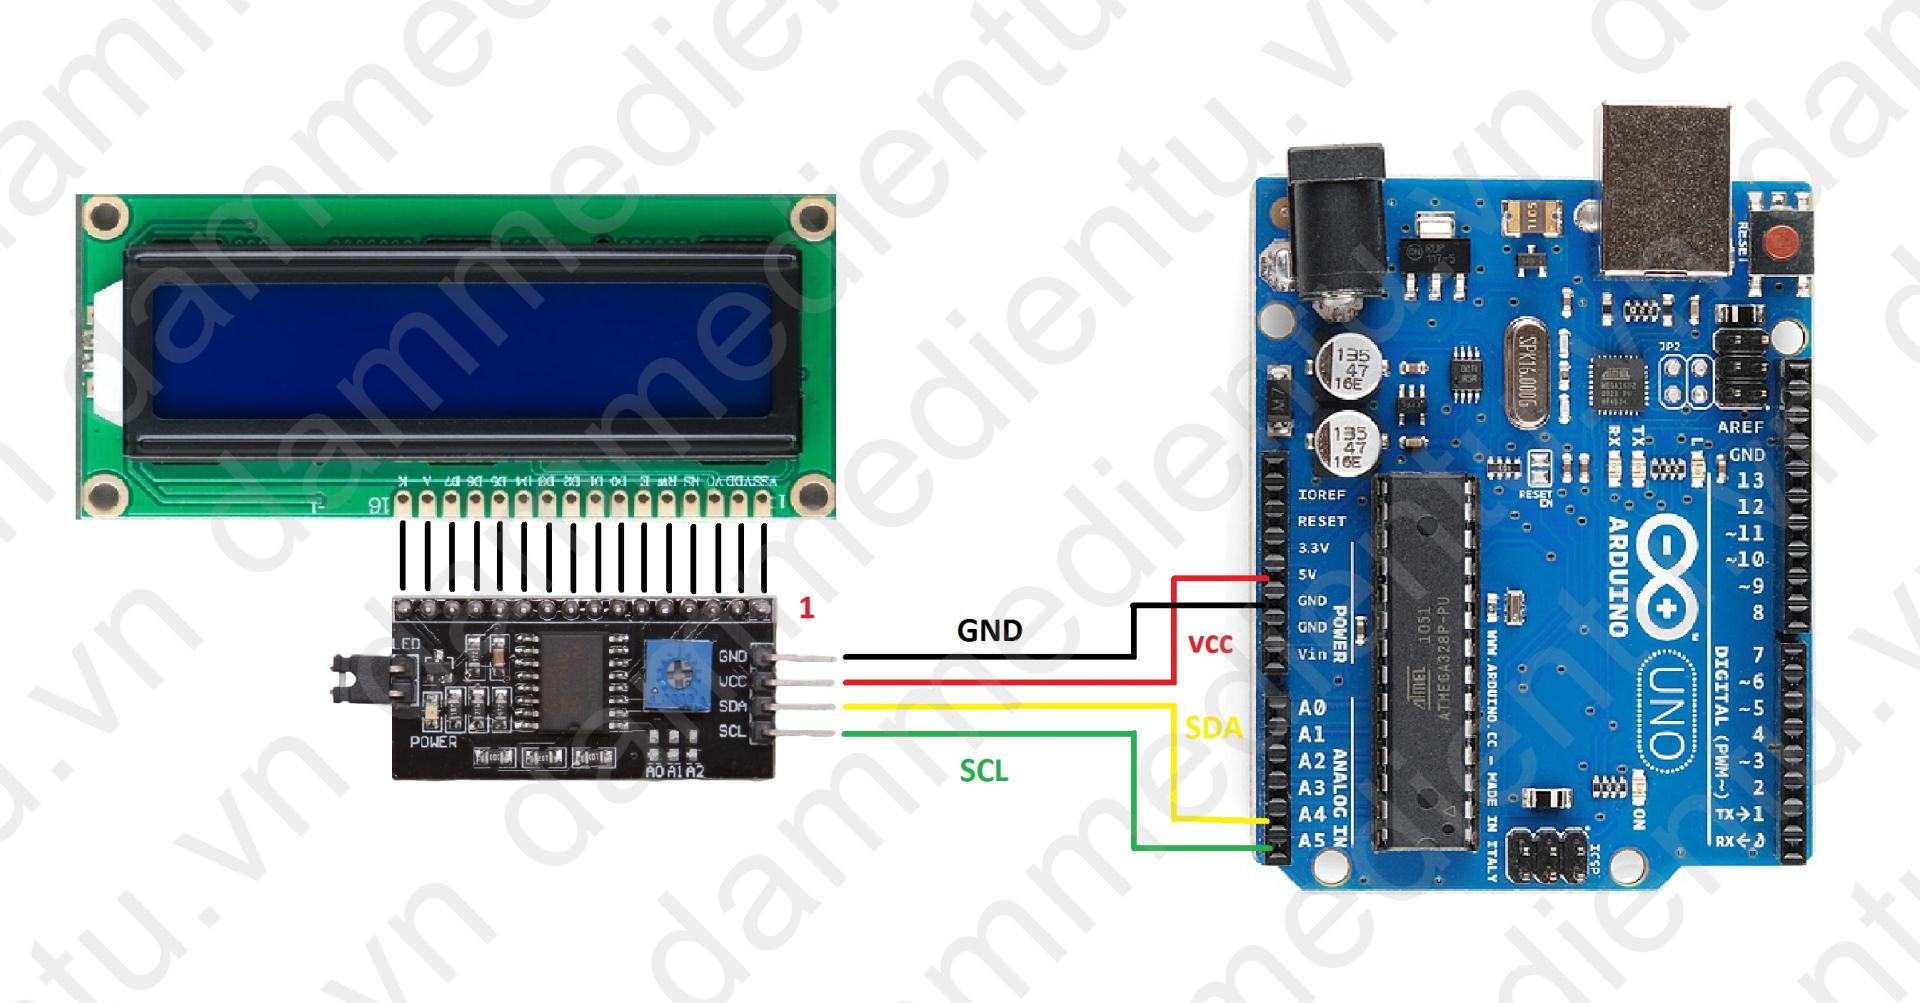
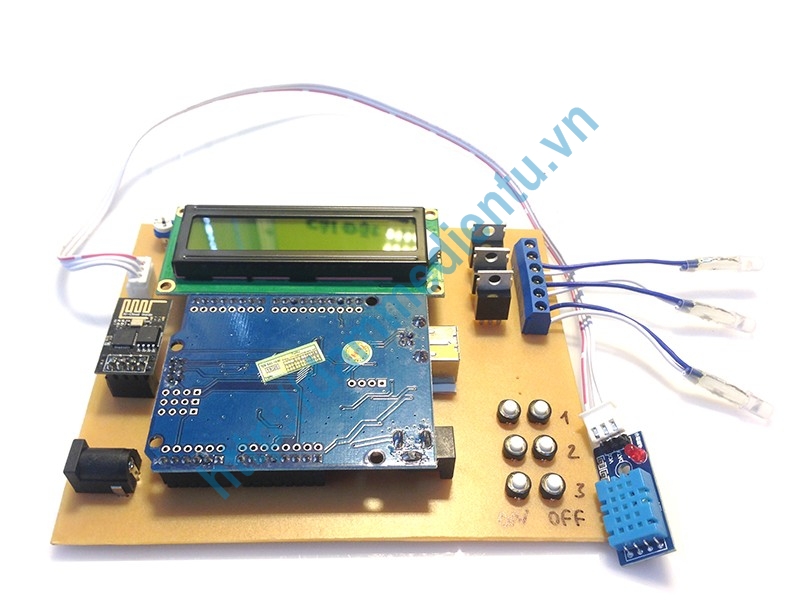
Kết nối Module I2C CF8574 & LCD16x2 & Kit Arduino
| Kit Arduino | Module Lcd I2C -PCF8574 |
| A4 | SDA |
| A5 | SCL |
| 5V | VCC |
| GND | GND |
Các bạn download và add thư viện liquidcrystal-pcf8574-i2c.zip này vào trình Arduino IED
Hướng dẫn add thư viện vào Arduino IDE các ban tham khảo Tại đây :
/////////////////*   customchars.ino  *///////////////////////

#include <Wire.h>
#include <LiquidCrystal_I2C.h>

uint8_t bell[8]  = {0x4,0xe,0xe,0xe,0x1f,0x0,0x4};
uint8_t note[8]  = {0x2,0x3,0x2,0xe,0x1e,0xc,0x0};
uint8_t clock[8] = {0x0,0xe,0x15,0x17,0x11,0xe,0x0};
uint8_t heart[8] = {0x0,0xa,0x1f,0x1f,0xe,0x4,0x0};
uint8_t duck[8]  = {0x0,0xc,0x1d,0xf,0xf,0x6,0x0};
uint8_t check[8] = {0x0,0x1,0x3,0x16,0x1c,0x8,0x0};
uint8_t cross[8] = {0x0,0x1b,0xe,0x4,0xe,0x1b,0x0};
uint8_t retarrow[8] = {    0x1,0x1,0x5,0x9,0x1f,0x8,0x4};

LiquidCrystal_I2C lcd(0x27,16,2);  // set the LCD address to 0x27 for a 16 chars and 2 line display

void setup()
{
lcd.init();                      // initialize the lcd
lcd.backlight();

lcd.createChar(0, bell);
lcd.createChar(1, note);
lcd.createChar(2, clock);
lcd.createChar(3, heart);
lcd.createChar(4, duck);
lcd.createChar(5, check);
lcd.createChar(6, cross);
lcd.createChar(7, retarrow);
lcd.home();

lcd.print("Hello world...");
lcd.setCursor(0, 1);
lcd.print(" i ");
lcd.write(3);
lcd.print(" arduinos!");
delay(5000);
displayKeyCodes();

}

// display all keycodes
void displayKeyCodes(void) {
uint8_t i = 0;
while (1) {
lcd.clear();
lcd.print("Codes 0x"); lcd.print(i, HEX);
lcd.print("-0x"); lcd.print(i+16, HEX);
lcd.setCursor(0, 1);
for (int j=0; j<16; j++) {
lcd.write(i+j);
}
i+=16;

delay(4000);
}
}

void loop()
{

}
//////////////////////////////* kết thúc chương trình */////////////////////////
![Lập trình Arduino – Hướng dẫn kết nối LCD OLED 0.9 [SSD1306] với ARduino Uno](https://dammedientu.vn/wp-content/uploads/2018/02/hello_gf-1.jpg)